Forum Replies Created
-
AuthorPosts
-
 AndyKeymaster
For the size and color, use this custom CSS (change the size and color values):
#page-slider-section .bx-wrapper .bx-controls-direction a .fa {
  font-size: 24px;
  color: #ffffff;
}
For the background color, use this custom CSS:
#page-slider-section .bx-wrapper .bx-controls-direction a {
  background: rgba(0,0,0,0.2);
}
By default there is also a background color when hovering the mouse on the control:
#page-slider-section .bx-wrapper .bx-controls-direction a:hover { background: #b50b52; } AndyKeymaster
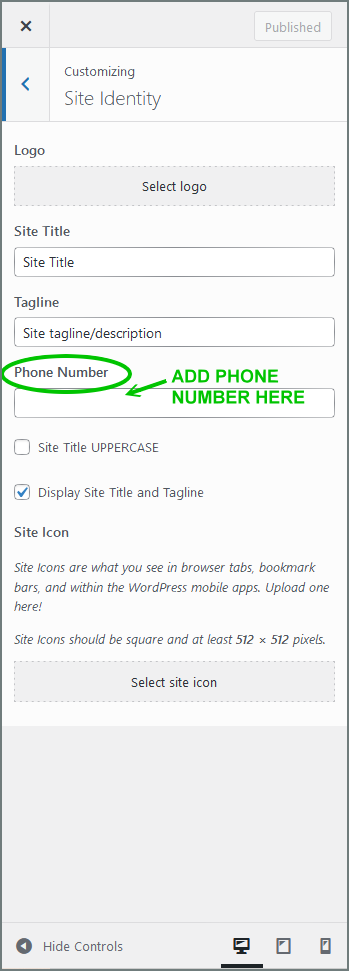
The phone number can be added/edited at ‘Appearance’ > ‘Customize’ > ‘Site Identity’.
Write your phone number in the “Phone Number” text box and click the ‘Publish’ button.See screenshot below which shows the location of the phone number in the customizer.

 AndyKeymaster
It’s not possible to target a specific page with the page name, but you can use the page ID, for example a page with the ID of 123:
.page-id-123 .site-content { margin-top: 0; } AndyKeymaster
The main body font size can be changed by adding this small CSS snippet at ‘Appearance’ > ‘Customize’ > ‘Additional CSS’:
body {
  font-size: 15px;
}
15px is the default size. Change this to a different value.
Some parts of the theme (headings, navigation etc) have their own defined font size.
If you want to change the size of a specific element, please let me know exactly which you want to change, and I’ll be able to assist further. AndyKeymaster
When you define a page as the main blog page, that page becomes the main blog index archive and will only show the latest posts, and will not display any content you have added to the page.
So there should not be an error message or any content other than just the standard latest posts.
In the page editor, you will still see the content you have added but it won’t be visible on the front-end.Hope I have understood your question correctly? If not, please let me know the page URL and I’ll be able to take a look and advise further. Thanks.
-
This reply was modified 4 years, 9 months ago by
 Andy. Reason: additional info
 AndyKeymaster
Add this CSS to ‘Appearance’ > ‘Customize’ > ‘Additional CSS’:
.site-content {
    margin-top: 0;
}
This will remove the gap on all pages across the whole site.
If you only want to remove the gap on a particular page (the page in your screenshot doesn’t seem to be live when I visit your site), please let me know the page URL and I’ll be able to help further. AndyKeymaster
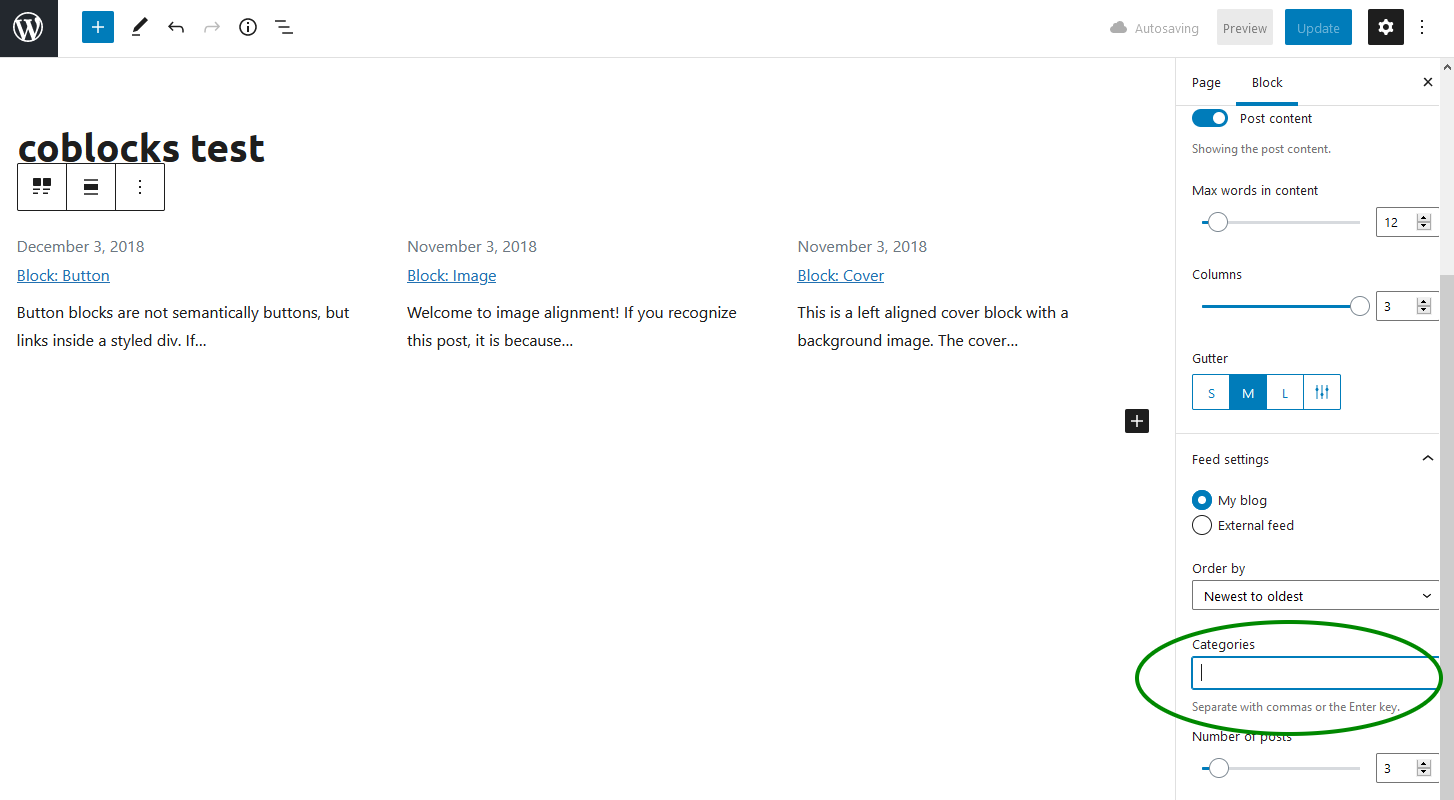
That message is because you have deactivated or removed the CoBlocks plugin.
You should first re-activate the CoBlocks plugin, and then you can enter the categories to filter in the ‘Feed Settings’ > ‘Categories’ setting in the block sidebar options panel. See image below.

 AndyKeymaster
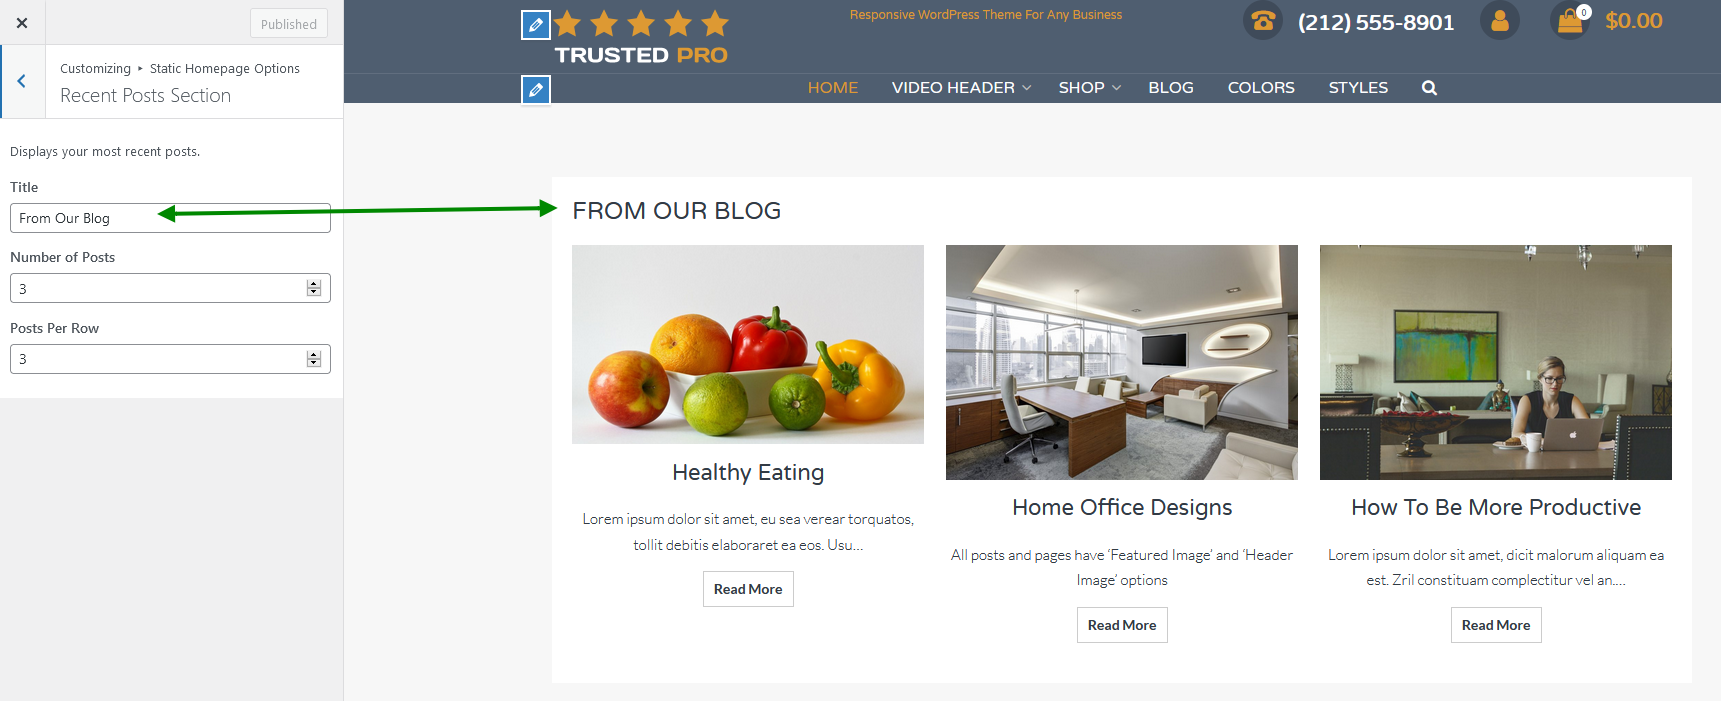
This is the homepage “Recent Posts Section”, and it is accessed in the customizer.
In your dashboard go to ‘Appearance’ > ‘Customize’ > ‘Static Homepage Options’ > ‘Recent Posts Section.
Here you can change the title, the number of posts, and the number of posts per row. See image below.
 AndyKeymaster
It doesn’t make the footer disappear.
It is a specific part of the footer that is a widgetized area in which the default “Powered by…” text can be replaced with your own text/content.
 AndyKeymaster
Hello Anne, did this answer your question to your satisfaction?
 AndyKeymaster
Hello Anne, did this answer your question to your satisfaction?
 AndyKeymaster
You could add it as a menu item in the header menu, and then use custom CSS (Appearance > Customize > Additional CSS) to make it appear as a button:
#primary-menu > li:nth-of-type(3) {
    background: red;
    border-radius: 3px;
}
In the example above, change the background color to any color you want, and change the number in brackets
(3)to the number of the menu item. For example if it is the 4th item use number(4)and so on. AndyKeymaster
You could add it as a menu item in the header menu, and then use custom CSS (Appearance > Customize > Additional CSS) to make it appear as a button:
#primary-menu > li:nth-of-type(3) {
    background: red;
    border-radius: 3px;
}
In the example above, change the background color to any color you want, and change the number in brackets
(3)to the number of the menu item. For example if it is the 4th item use number(4)and so on. AndyKeymaster
There is a “Top Bar” widget area where you can write your content.
To access the widget areas go to ‘Appearance’ > ‘Widgets’, or ‘Appearance’ > ‘Customize’ > ‘Widgets’.
Add any of your available widgets (e.g. a “Text” widget) to the “Top Bar” widget area and hit ‘Save’. AndyKeymaster
The answer to your other question “Remove the footer ‘powered by’ and UXL Themes credit” can also be found in our documentation which is in the menu at the top of this site.
Open the ‘Theme Options‘ tab and under the ‘Removing/Changing Theme Footer Info‘ you will see the tutorial showing how to replace the footer copyright/theme information.
-
This reply was modified 4 years, 9 months ago by
-
AuthorPosts
